
Supplies:
Tube: RobertAlvarado-54-1
Scrap: Scrapaork_Spooky-mini
Font: Arbatosh
Mask: 116 from Package 3
Please do not use any of the licensed supplies without purchasing them first.
First off, unzip all supplies.
Open the mask(s) you would like to use. You don’t have to use the ones I have chosen.
Select > All
Edit > Copy
This will save a “selection” of the white areas in the mask.
You can now close that mask.
Open a new 800 x 800 pixel canvas. Be sure it is set to 72ppi resolution. You can always resize later.
Thanks to Gail Wilson for this little trick, we can eliminate a step later in the tut.
Layer > New Layer…
You will now have TWO blank layers on your tag. The bottom layer should stay blank for the entirety of the tag creation.
Edit > Fill… this layer with white. You can change this to whatever color you like to match the website you will display it on, though.
Place the paper on the canvas that you would like to use. You can either drag and drop it onto the canvas from your file browser, or you can use the File > Place… method. Just browse to the folder with the kit when prompted.
With the paper layer highlighted in the layers panel…
Select > Edit in Quick Mask Mode.
Edit > Paste
This will leave parts of the paper in red. This is good! If it doesn’t, then you will need to open and copy the mask again.
It seems that our mask was too big for the tag. Let’s fix that.
With the red “quick mask” still in effect, go to Edit > Free Transform
Fit the red mask inside your tag.
Select > Uncheck the Edit in Quick Mask Mode.
Layer > Layer Mask > Reveal Selection
Magic, right?? now you don’t have to worry about having an extra clipped layer.
Instead, you have a mask thumbnail attached to your paper layer.

Place another paper on your canvas and repeat the process with any other masks you want to use.
That’s it! How easy is that?
Now, time for the elements! This is where the real magic begins.
You can drag and drop items straight from your file browser into the canvas. This makes it faster to place items.
Instead of telling you exactly where to put what and what size to use, I am just going to show you a animated image of what I did. This way, you can create your own version of the tag without doing exactly what I have done.
When placing your elements, you can transform them again by going to Edit > Free Transform. Just be sure you hold the shift key to constrain the proportions.

As you can see, it is pretty random. I just place the items where I think they might work.
Now, back to the frame element layer. You have a frame, right? If not, you can skip this part. We need to add a fill layer to the picture frame.
Highlight the layer UNDER the frame in your layers panel. Now drop the paper you would like to use onto the canvas.
Grab your selection wand from the tools panel. If you can’t find it, check out the basics page for a better understanding of the tools layout.
The Selection Wand options should look like this at the top of your window:

Click on the center portion of the frame.
In the upper menu of Photoshop, click on Selection > Modify > Expand…
Expand your selection by 2px.
Now highlight your paper layer.
Go to Layer > Layer Mask > Reveal Selection.
Now you have a fill to your frame. Easy Peasy!
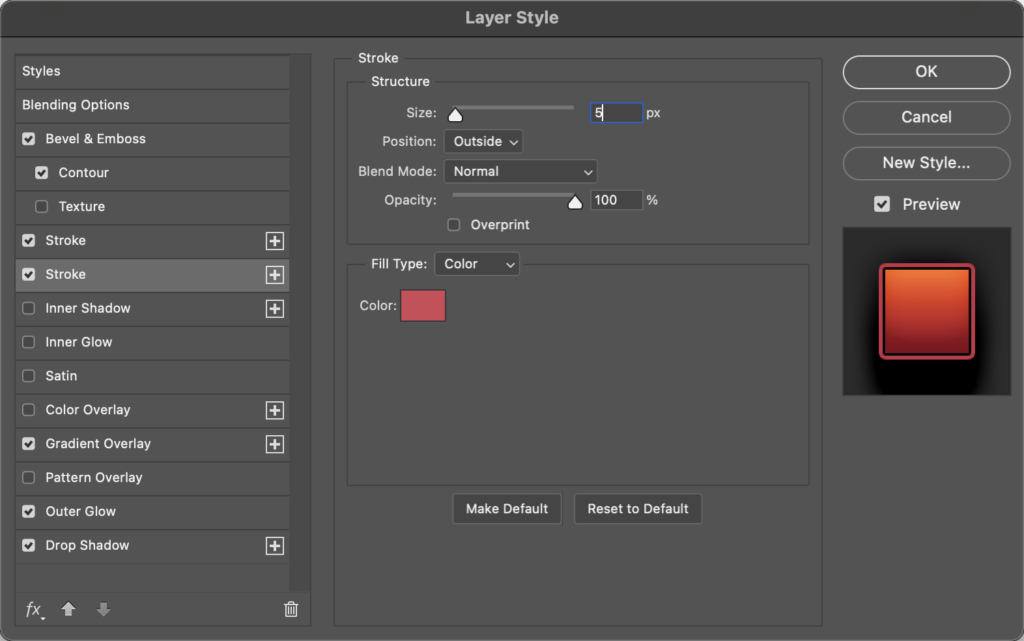
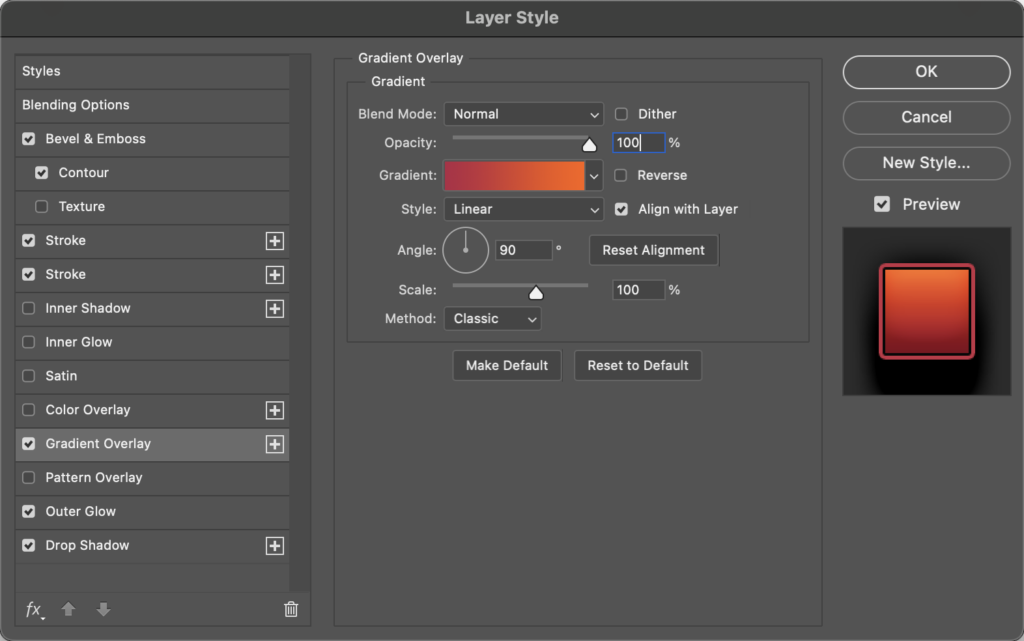
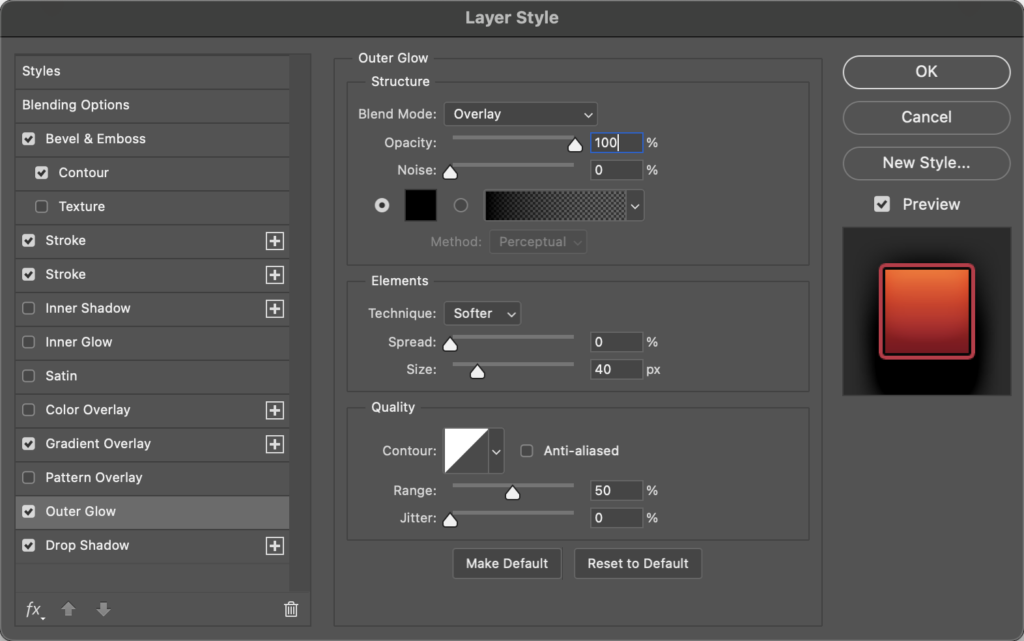
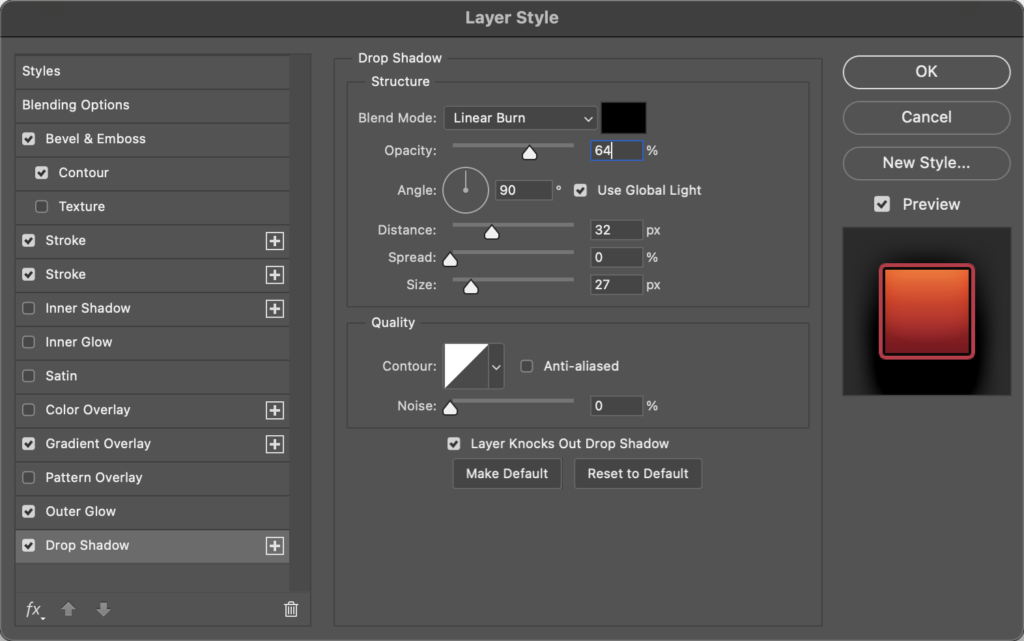
We definitely want to add some shadows to our elements. Without shadowing, the tag will just look flat. The secret to a good tag, is a good shadow effect.
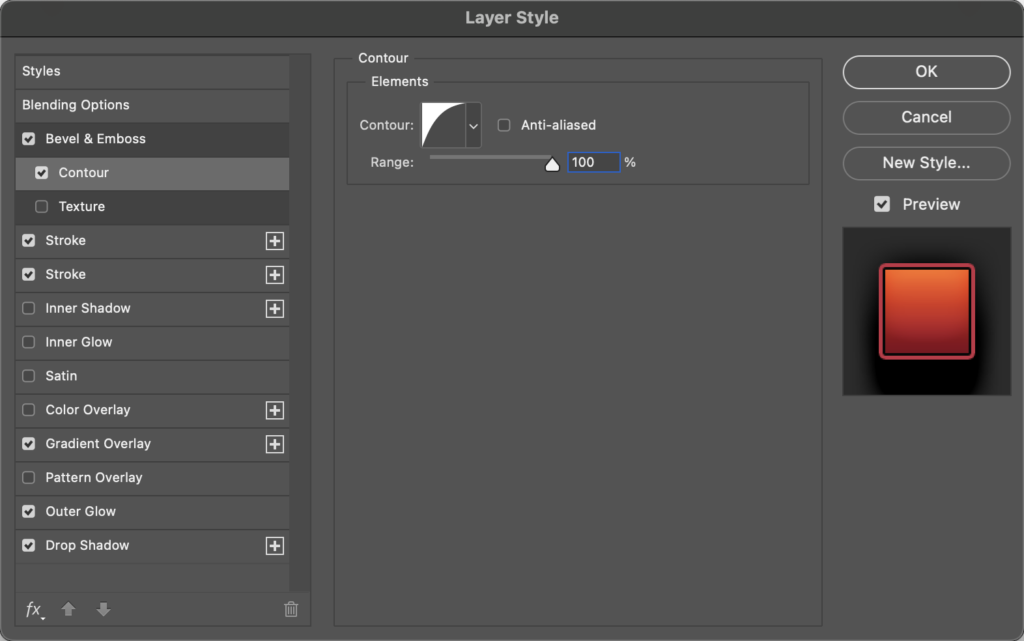
Right click (or ctrl+click) a layer and choose “Blending Options.”
I add a drop shadow and an outer glow. The glow enhances the effect a bit.


Now after you have hit OK, right click the layer again and choose “Copy Layer Style.”
Highlight all of your element layers (click the top one, then shift + click the bottom one) and right click again. This time, choose “Paste Layer Style.”
It makes a HUGE difference to add shadows:
Now that we have all of that done, time to add the next details. Tube and text. Fun!
Choose where you want your main tube to be placed.
Now drag and drop your tube onto the canvas. Resize and adjust it to your liking. Always make sure you constrain your proportions while resizing. Hold the Shift key while you drag the corners.
Add the same drop shadow you did before.
If you would like to remove the excess shadows from around your tag, I have explained how to do that HERE.
Resize before adding copyrights!
Highlight the top layer of the layers panel.
Grab your text tool and add the name you would like. Position it just where you want it and add a layer style. This is mine:
To add a secondary option to a single effect, click on the [+] on the left of the option title. The order you place the effects matters!


That leave us with the non-animated version of the tag! If you wold like to keep the JPG version, you can save here. Simply File > Save As… and choose the jpg option from the drop down box at the bottom of the dialog.

Here’s where it starts getting complicated. We want to add animation!
Make sure your Animation Panel is open. Window > Timeline (or Animation, if you are on earlier versios)
You will need to click the “Create Frame Animation” button. If you do not see this button, please refer to THIS page for more information about the timeline.

You will see that your first frame is already there.
But you don’t need to worry with the frames yet.
Hide your tube layer, so we can see what we are doing.
In your layers panel, highlight the moth layer (or whatever winged element you chose).
It is in a Smart Object, right? If you aren’t sure, look at the thumbnail of your element. There will be a small icon on the thumbnail image to indicate the Smart Object.

If you see that icon, we can proceed. If not, then go to Layer > Smart Objects > Convert to Smart Object. This is to ensure the quality of your element does not decrease with the next steps we are about to take.
Go to Edit > Puppet Warp
A mesh is now overlaying your element. This is how we are going to manipulate it to “fly.”
Click to add anchor points to the mesh. This is where I have added mine. More anchor points on the body portion will make sure that only the wings will move when we start the animating.
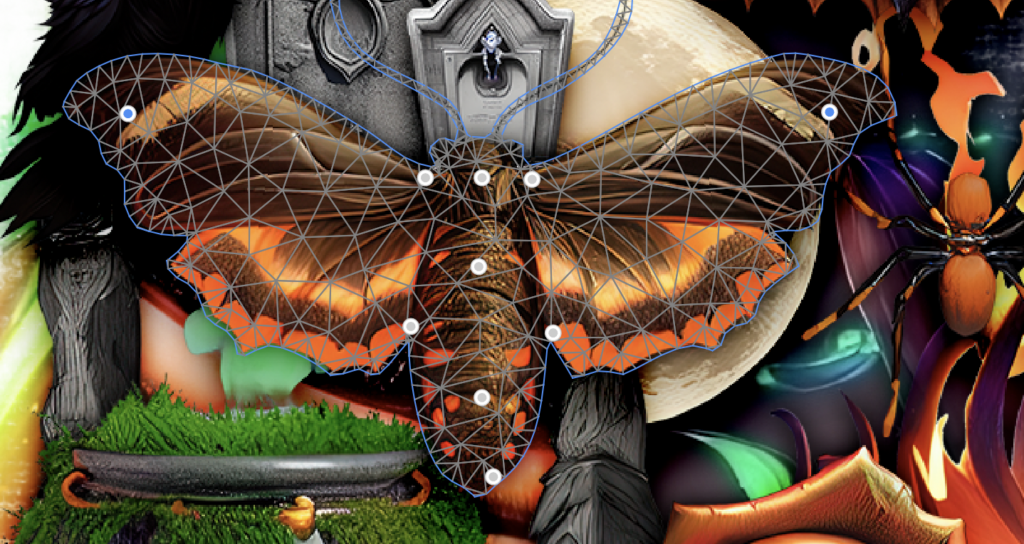
You see that the two wing tip anchor points on mine are highlighted. To do so, click on one of the points, hold shift and click on the other anchor point. They should be the two that are blue. The others should be gray.
Click on the check mark at the top of your screen to set the warp.
Duplicate this layer in the layers panel.
Edit > Puppet Warp.
Now you see that the anchor points are still there. This is the importance of the Smart Object. Without it, you would have to reset all points. But I digress, let’s continue.
Are the two wing tip points still in blue? Great! Now hold the shift key and tap once on the UP button of your keyboard. You see that both wings moved up. Great!
Now set the warp with the check mark again.
Duplicate this layer. Edit > Puppet Warp. Hold shift and press UP on your keyboard again.
Continue this chain until you have 6 moth layers.
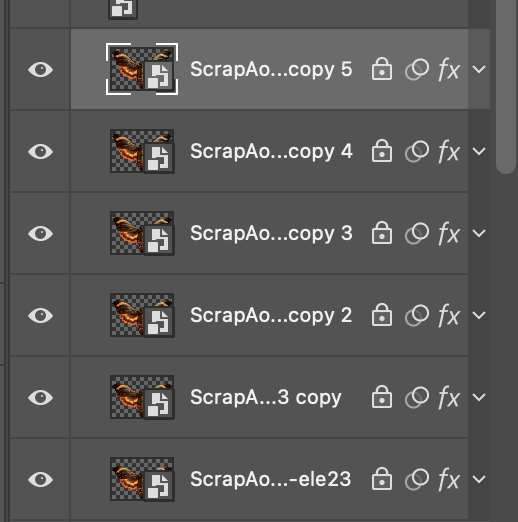
Now that we are finished with those layers, hide all moths except the original layer.
Now’s the time to unhide your tube, also. (Thanks stu, for the reminder lol)
Now down in your animation panel, duplicate the frame by clicking the [+] at the bottom of the panel (it is a folded paper icon for older versions).
In the layers panel, hide the original moth layer and unhide the second moth layer.
Duplicate the frame in the animation panel again.
Hide the second moth in the layers panel, and unhide the third.
Continue until you have 6 frames in the animation panel with each moth layer.
But we aren’t finished yet.
Duplicate the frame in the animation panel.
Hide the sixth moth layer. This time unhide the fifth moth layer in the layers panel. Yes, now we go backwards.
Duplicate the frame again. Hide the fifth moth and unhide the fourth.
Duplicate again. Hide the fourth moth and unhide the third.
Duplicate again. Hide the third moth and unhide the second.
Don’t duplicate again. We don’t want the first moth layer repeating. That would cause a skip-like visual.
You should now have 10 frames in your animation panel.
You can now click play at the bottom of the animation panel to check out your creation!
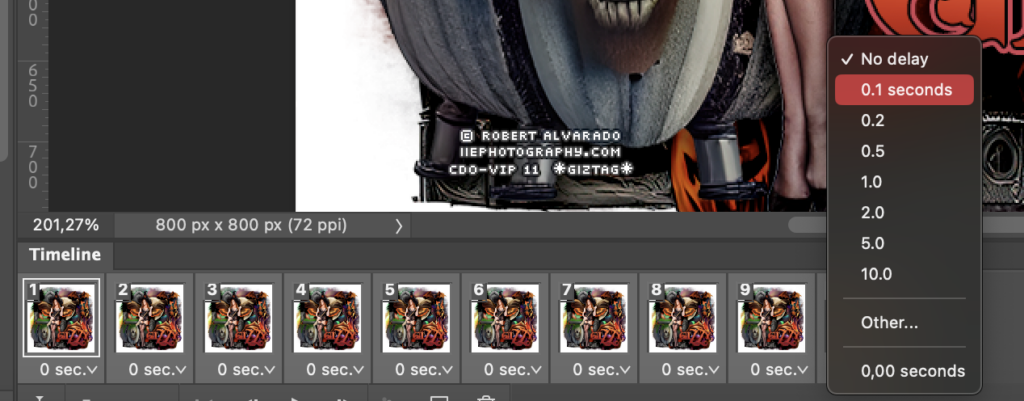
Oh, right! Don’t forget to set your frame delay.
Highlight all of your frames in the animation panel. Highlight the first frame and then hold shift. Click on the last frame. Now all frames are highlighted.
Click on the little arrow beside the time of the last frame. This will bring up a popup for more “delay” options.
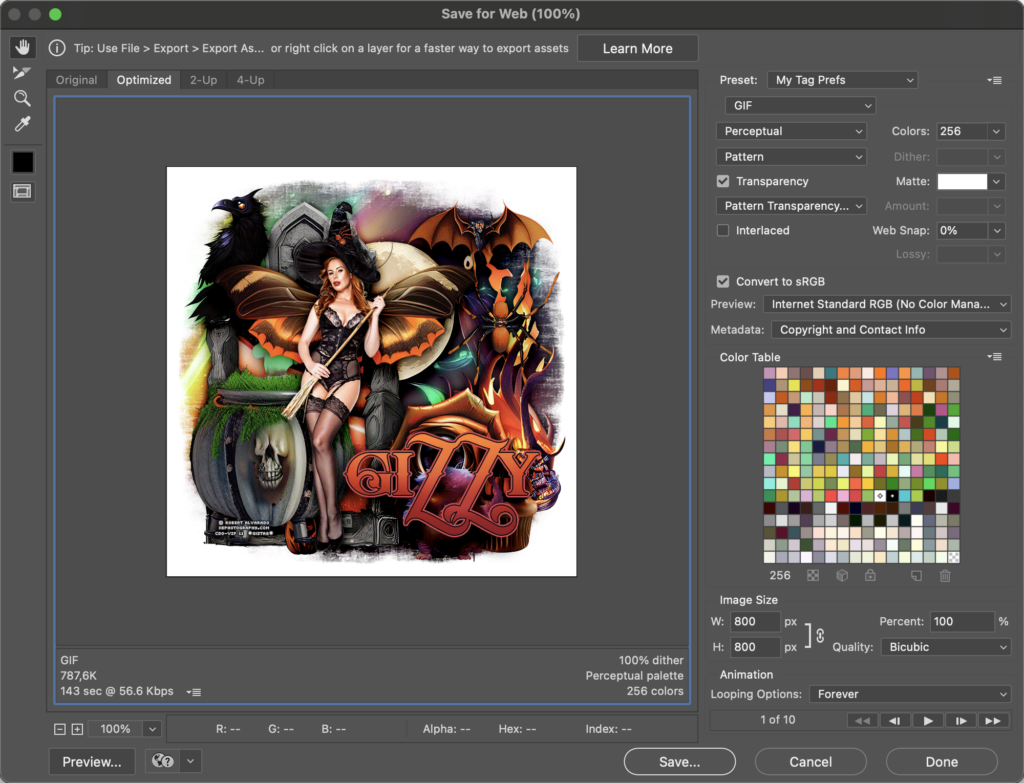
Now you will need to save your animation as a gif file.

In your animation dialog, use these settings:

 My “Forever List” can find their tags in their Fotki Folders.